 As you may or may not recall (or care) two of the most worn-out parts on the old Trek were the wheels. This bike originally came equipped with 36 spoke wheels front and rear, laced to single-wall Araya rims in a cross-3 pattern. Nothing special. What they lacked in lightness and refinement they recouped by being seriously overbuilt. They stayed reasonably true and completely free of spoke breakage (despite advanced spoke rust) through many years of potholes, drops, curb hops, and off-road adventures. The last few winters took their toll, however, and the added grit and abrasives of road salt and dirt had ground the braking surfaces to critically thin condition-putting them at risk of sudden failure. The original hubs were the only parts with any life left in them, so I planned on lacing new spokes and rims to overhauled original hubs.
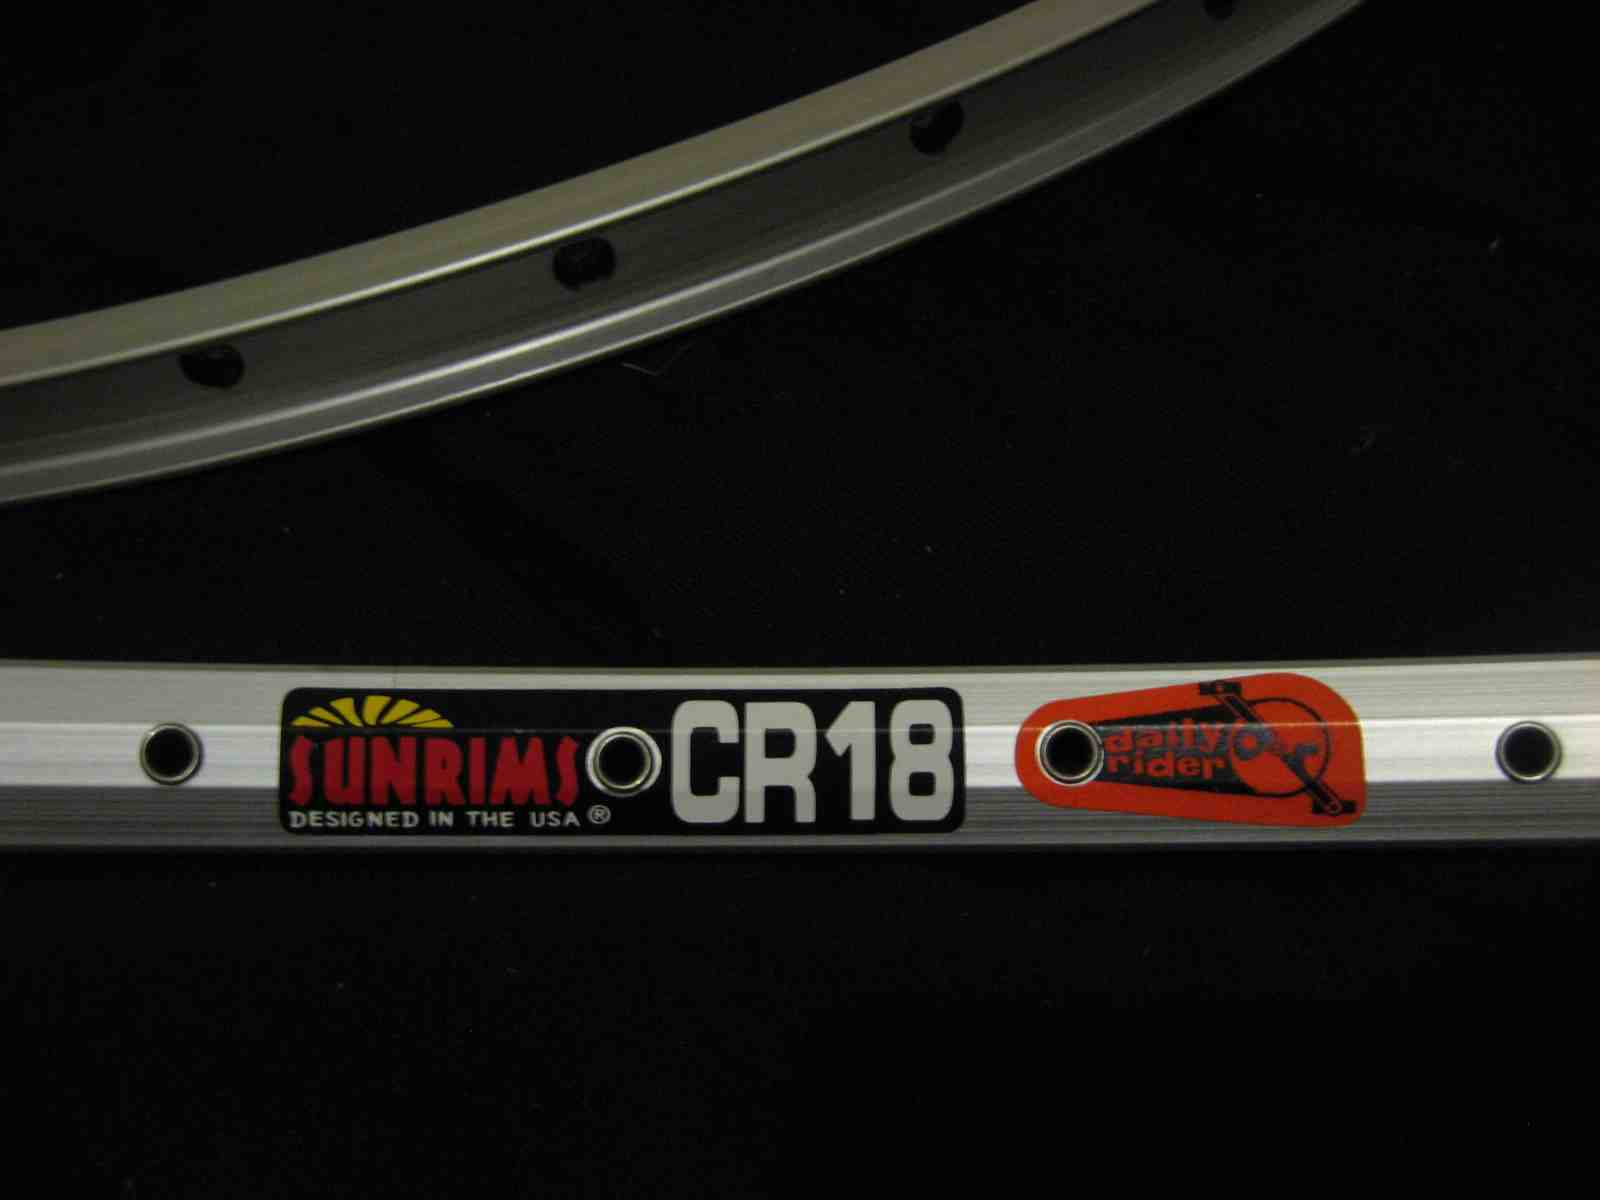 The choice of a pair of Sun CR18s as my new rims was an easy one. They have a great reputation, can be found online for short money and they are approved for touring and tandems. Mine were found at a discount for cosmetic reasons- slightly flawed anodizing on the braking surface is barely noticeable and will disappear as I ride the bike anyway. These rims should be more than sturdy enough for my planned trip and all subsequent flogging.
The original hubs are nothing special. It would make more sense and be more cost-effective to toss the wheels altogether and find a decent replacement set on sale, but that wouldn't be in keeping with my original goals to save as much of Dad's original bike as I could and learn new skills through this project. A "Joytech 95D" loose-ball bearing hub up front and a Shimano Acera cassette hub out back have gotten the job done for over 15 years now. I've been pretty good about cleaning and repacking the ball bearings over the years, so a new set of bearings should make them once again good-as-new.
I took the old wheels apart. While cutting is a popular method to quickly and conveniently liberate a hub for reuse, I loosened and disassembled the wheels spoke-by-spoke so as to reverse-glean some understanding as to how a laced wheel is held together. This gradual reduction of tension (versus the sudden release of cutting) also reduces stress on a hub if you are planning to reuse it. I set aside a couple of spokes in case they were needed for length-matching purposes (they weren't), and a few more because used spokes have a host of other uses. I noticed that the spokes were a tad long on the front wheel, ending slightly proud of the outermost part of the nipples. Between that and the slightly smaller inner diameter of the new rims, I reasoned that the new spokes should probably be 2 or 3 mm shorter than the originals. I planned on buying the spokes locally, figuring it would be a good way to glean some tips and expertise from more wheel-savvy mechanics. DT Swiss and Wheelsmith seemed like the best-loved and most widely available quality spoke choices, but I figured I'd just use whatever they used at a knowledgeable shop. I wound up at Central Wheel, where Dave was cool and helpful and served as translator/go-between for the wheel guy, who for some odd reason wouldn't address me directly from 10 ft away (that was kind of weird, actually...). The wheel guy simply went ahead and entered the measurements of my old hubs and new rims plus the lacing pattern (cross two) into some fancy spoke calculating thingie. The results were 72 spokes labeled for their front and rear positions plus a bag of nickel-plated brass nipples. All these elements will come together to form some wheels in the near future. I'll keep you posted.
Friday, April 30, 2010
Dad Trek III: The Search For Spokes
Subscribe to:
Post Comments (Atom)

1 comment:
Nice project. I save wheelbuilding/truing for cold, crappy, rainy days when another member of the household is watching a crappy movie on TV and requests my presence, obtusely a social obligation. Sitting in the middle of the living room floor as the rain (and the movie sound track) drones on, I half pay attention to the movie and wholly pay attention to the wheel task at hand.
I did a rear wheel with a Sun CR18 rim a few years ago, on aforesaid such crappy weather/livingroom day. Nice rim!
Easiest method of replacing just the rim is to tape the new rim side by side to the old, valve stem holes aligning, and simply transfer spokes over one by one. When done, untape and chuck old rim. These make a nice ring toss over a convenient tall, publicly displayed structure.
In your case, a similar transfer-like technique could be employed. Upon removing a spoke nipple, remove the spoke from the hub and install new spoke from hub to new rim in similar relation to other spokes as old spoke.
Additionally, I like to place a little grease on the spoke threads before intallation of a nipple. This prevents future seizure of threads, and also reduces torque induced spoke twisting which otherwise tends to later "unwind", throwing off spoke adjustment and turning your nice, true wheel into a wobbler. I have noted that wheels stay truer for longer periods when grease is used on spoke threads.
Drew
Post a Comment