Showing posts with label wheel truing. Show all posts

Wednesday, June 15, 2011

Spoke quest


As you know, I've been breaking a lot of spokes lately. As cool as the 31 spoke pattern is, I want my rear wheels to stay burritos and not tacos. So, while eating pho yesterday, Dario and I decided that we should buy new spokes in Berlin. So, we rode down to Berlin Bike yesterday on two of my 63 spoked mountain bikes. Berlin Bike is a good bike shop, because they take the time to sell you the correct length spoke even if you're going to lace it yourself. I really appreciate that.

Vietnamese car cats

Greatest veggie burger ever made
Read more!

Tuesday, June 8, 2010

Lace it up


When I last left off, I had a pile of parts that contained the makings of two wheels for the Trek. Not one to miss an opportunity to over-analyze things, I took a good hard look at the hubs. The Shimano Acera rear hub had proven to be a sturdy workhorse and promised more years of the same, but the Joytech 95D up front was looking more and more outclassed. The spoke holes were kind of huge and made for a sloppy fit for my new spokes, which is a bad thing. Everything I read about wheelbuilding was stressing using top-quality components. The Joytech had never let me down, but it was definitely the weakest link in this pending wheelset. In the end, sturdiness trumped sentimentality.

Since I already had the spokes and nipples ready, I searched for a hub with the same dimensions as the original. I found a new discontinued 36 hole Shimano Ultegra hub on ebay that fit the bill nicely. A lower than "Buy it now" price offer was accepted, and it was at my door within a few days. Holding the replacement piece in my hands made me very happy about my decision to upgrade. Nice hub!

I did my homework, re-reading Sheldon Brown's article and Peter White's wonderful and knowledgeable rants on the subject many times over. I had sought a copy of the well-regarded book, "The Bicycle Wheel" by Jobst Brandt while visiting Harris Cyclery a while back but they were out of stock, so I picked up Gerd Schraner's "The Art of Wheelbuilding" instead. I was initially sort of disappointed by this pricey, somewhat thin booklet, but warmed up to it when I got to the easy-to-follow spoking diagram. All the other diagrams I had seen in the past were a side view with color-coding for each series of spokes. Schraner's 3/4 view diagrams were much more intuitive for me and a cinch to work with.

I started with the front wheel. This would be the easier of the wheels to build, featuring all-new parts and symmetrical dishing. My readings have suggested that building a wheel should take about an hour or less from start to finish. It easily took two or more, but I'm really happy with the outcome. I oiled the spoke threads to ease tighteneing the nipples up to the proper tension. I used my new tensiometer a lot. It was fun and addictive. The wheel came out nicely.

I really like wheelbuilding. It's like a happy little safe house for all of my O.C.D. tendencies. I actually finished the pictured wheel shortly before I left for Oregon several weeks ago. I had a lot of opportunities to practice wheelbuilding and ply more experienced wheel geeks for tips while I was out there. Next up will be the rear wheel. I am going to reuse that hub for sure, but it needs some attention first. Coming soon: hub overhaul and freehub replacement, or how to make one solid hub from three somewhat tired ones.
Read more!

Friday, April 30, 2010

Dad Trek III: The Search For Spokes

As you may or may not recall (or care) two of the most worn-out parts on the old Trek were the wheels. This bike originally came equipped with 36 spoke wheels front and rear, laced to single-wall Araya rims in a cross-3 pattern. Nothing special. What they lacked in lightness and refinement they recouped by being seriously overbuilt. They stayed reasonably true and completely free of spoke breakage (despite advanced spoke rust) through many years of potholes, drops, curb hops, and off-road adventures. The last few winters took their toll, however, and the added grit and abrasives of road salt and dirt had ground the braking surfaces to critically thin condition-putting them at risk of sudden failure. The original hubs were the only parts with any life left in them, so I planned on lacing new spokes and rims to overhauled original hubs.

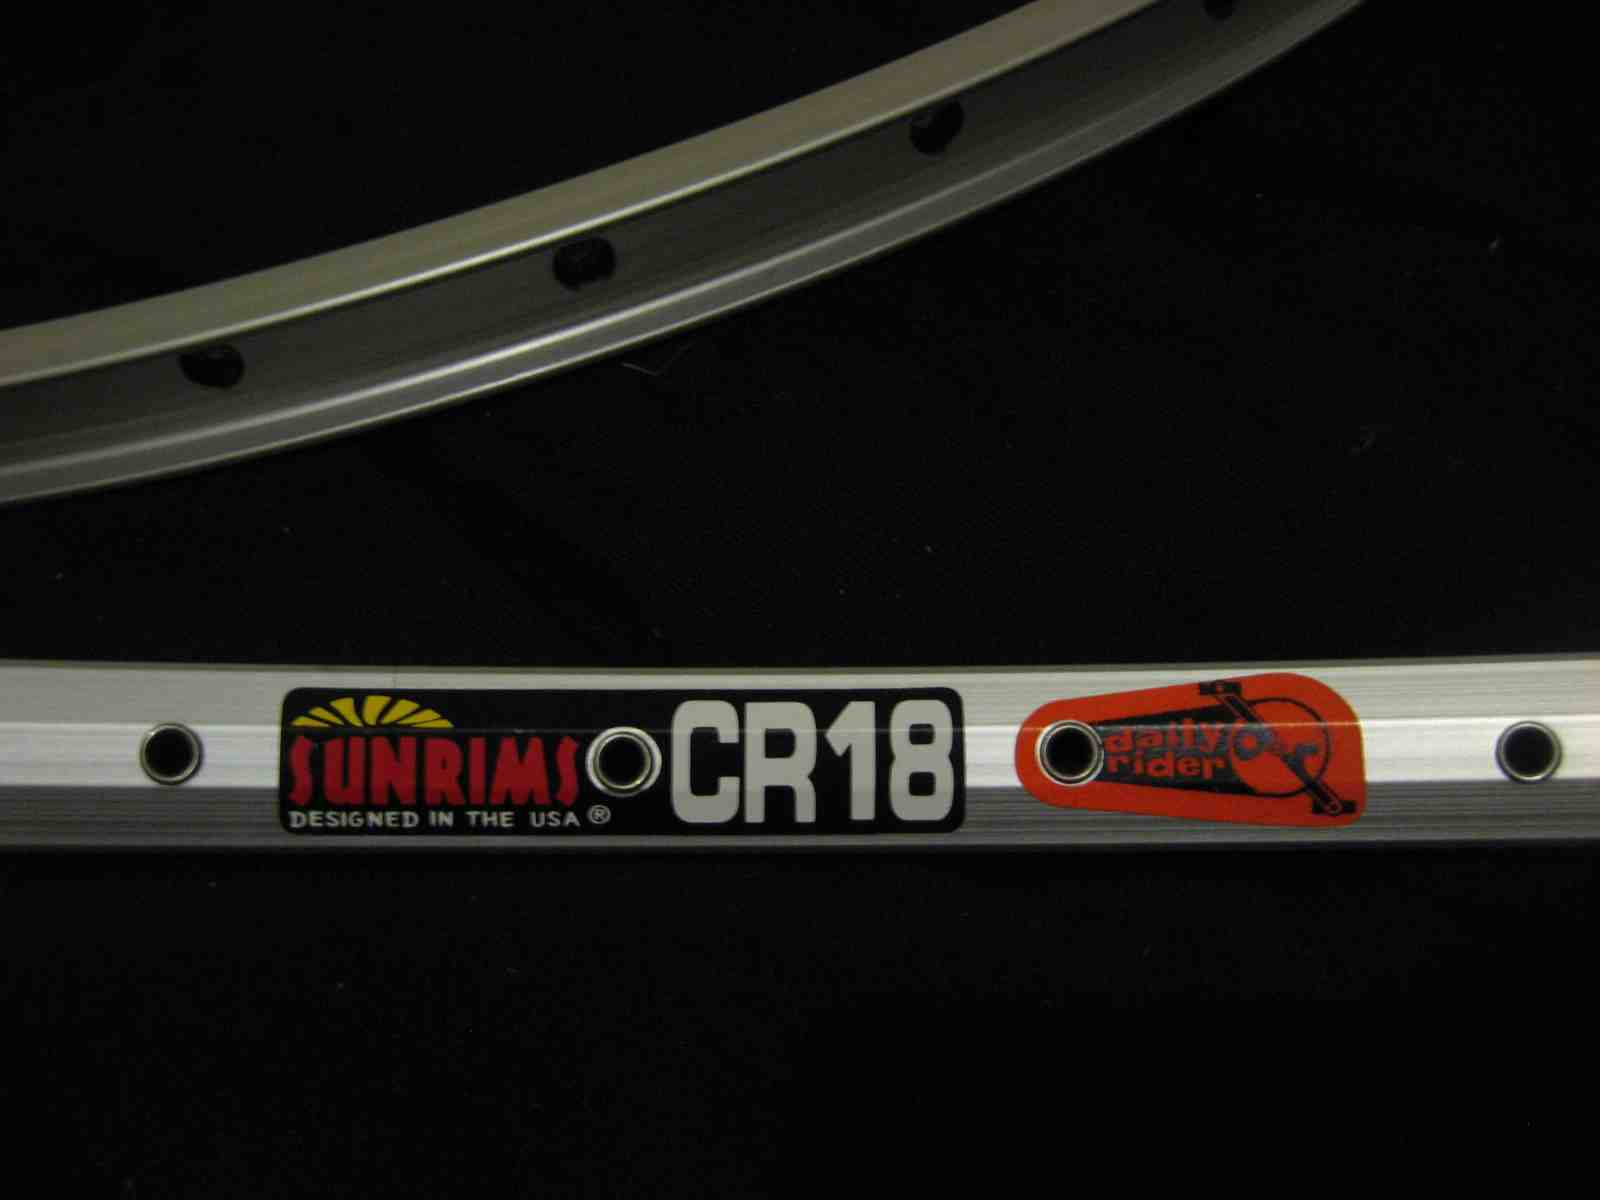
The choice of a pair of Sun CR18s as my new rims was an easy one. They have a great reputation, can be found online for short money and they are approved for touring and tandems. Mine were found at a discount for cosmetic reasons- slightly flawed anodizing on the braking surface is barely noticeable and will disappear as I ride the bike anyway. These rims should be more than sturdy enough for my planned trip and all subsequent flogging.

The original hubs are nothing special. It would make more sense and be more cost-effective to toss the wheels altogether and find a decent replacement set on sale, but that wouldn't be in keeping with my original goals to save as much of Dad's original bike as I could and learn new skills through this project. A "Joytech 95D" loose-ball bearing hub up front and a Shimano Acera cassette hub out back have gotten the job done for over 15 years now. I've been pretty good about cleaning and repacking the ball bearings over the years, so a new set of bearings should make them once again good-as-new.

I took the old wheels apart. While cutting is a popular method to quickly and conveniently liberate a hub for reuse, I loosened and disassembled the wheels spoke-by-spoke so as to reverse-glean some understanding as to how a laced wheel is held together. This gradual reduction of tension (versus the sudden release of cutting) also reduces stress on a hub if you are planning to reuse it. I set aside a couple of spokes in case they were needed for length-matching purposes (they weren't), and a few more because used spokes have a host of other uses. I noticed that the spokes were a tad long on the front wheel, ending slightly proud of the outermost part of the nipples. Between that and the slightly smaller inner diameter of the new rims, I reasoned that the new spokes should probably be 2 or 3 mm shorter than the originals.

I planned on buying the spokes locally, figuring it would be a good way to glean some tips and expertise from more wheel-savvy mechanics. DT Swiss and Wheelsmith seemed like the best-loved and most widely available quality spoke choices, but I figured I'd just use whatever they used at a knowledgeable shop. I wound up at Central Wheel, where Dave was cool and helpful and served as translator/go-between for the wheel guy, who for some odd reason wouldn't address me directly from 10 ft away (that was kind of weird, actually...). The wheel guy simply went ahead and entered the measurements of my old hubs and new rims plus the lacing pattern (cross two) into some fancy spoke calculating thingie. The results were 72 spokes labeled for their front and rear positions plus a bag of nickel-plated brass nipples. All these elements will come together to form some wheels in the near future. I'll keep you posted. Read more!

Tuesday, April 21, 2009

Still waiting for Hans Rey's response

Everyone everywhere has been talking about this, so in case you haven't seen it yet:

Read more!

Wednesday, March 18, 2009

Wheel Truing: Broken Spokes and Broken Hearts

This is not my wheel as Webshots currently won't allow my pictures to load into the blog!!


So I picked up a new road bike recently. Due to its low price I overruled many of its mechanical shortfalls figuring I could fix, swap, or modify its existing parts to get it back on the road. These maladies include a broken front brake lever/shifter, a slightly bent crankarm, and two wheels way out of true. The Campy shifter I intend to swap out for either equivalent Shimano parts or convert to downtube shifters (its 8spd Chorus which I hear is difficult to come by or outrageously expensive on Ebay). The crankarm I bent right back into line with an adjustable wrench. The wheels, however, required both skills and equipment that I yet possess.

Despite the poor condition of the wheels (being out of true is a bit of an understatement, perhaps absolutely false would be a more sufficient term, particularly for the rear wheel) they did not deter my enthusiasm to remedy the situation on my own accord. Regardless of the fact that I simply do not have the funds to have the job done professionally, I gain a certain amount of pride from maintaining and fixing my bicycles myself. I have a friend who owns a truing stand, and armed with a bit of internet-gained knowledge and a basic knack for the mechanical I set out last week to straighten up the new rims. A little overexcited about taking a hack at this new skill I foolishly brought just the wheels over to said friend's place and left the bike at home. After about a half hour of tinkering I had the front wheel spinning straight and true, success! I felt confident about the whole process and enthusiastically set the rear wheel in the stand to straighten it up. It was clear that this next step would be nothing like fixing the front wheel! The wheel looked more like a pretzel than something you'd place on your bike and the rim deviated left to right as much as a centimeter in each direction! After about an hour of cursing, sweating, twisting, and turning, I got the wheel spinning reasonably straight (good enough for my purposes at least). I took my wheels home feeling confident that I would have the bike rolling in no time.

Wrong. Turns out that while the wheels where true they were not dished correctly. The front wheel rubbed on the brake pads, slowing as they passed, while the rear wheel wouldn't even set into the dropouts due to its rubbing against the chainstays. I would have to attempt the whole process again.

Today was the day for my reattempt and I set out wheels in hand and (this time) bike on shoulder as I walked the several blocks to my buddy's place. This time I started with the troublesome rear wheel working on it for about an hour to bring the dish into line and re-true it. I set it in the frame which it dropped into cleanly and I felt I had done it! A slight wobble concerned me so I took the wheel back out and set it back in the stand to clean up my work a bit. Twisting and turning I worked through the spokes tightening and loosening to bring the wheel into line. One spot, however, alluded the perfection I was looking for. I kept alternating between loosening and tightening without success, I was beginning to get frustrated. Ready to leave well enough alone I turned one more spoke to finish up when... POP!!

I froze.

I couldn't believe it. It wasn't really happening. I looked down and indeed it had. I had broken one of the troublesome spokes that I could not leave alone. Perhaps I had bottomed out the spoke and was beginning to spin it rather than tighten it, perhaps it was just too tight or the pressure not balanced well enough. Regardless, my hours of work are wasted, and the wheel was in far worse shape than before.

Not to be defeated I picked up the front wheel and set to fixing it. No more than two minutes had it dished and spinning clean, no problems.

So now what? Part of me doesn't want to be defeated while another just wants the thing fixed. A part wants to finish what I started while another doubts I possess the skill to get this wheel (I like to think maybe just this particularly disheveled wheel) back into true. Do I simply fix the spoke or start from scratch and rebuilt it with new parts, do I have a shop do this for me? Oh tortuous decisions!! What shame and disappointment! How dramatic that I feel this about a bike, though im sure im not alone here. Regardless, there will be no riding of that bike for some time to come. Very sad. Read more!